Showing posts with label Vegetarian. Show all posts

Wednesday, September 29, 2010

Eggplant and Ricotta Sauce

Quick Announcement! For our Delaware readers, Will will be on WDEL 1150 AM on Rick Jensen's "Thirsty Thursday" show, talking about home brewing. The show is conveniently on Thursday at 3:30pm. For those of you not in Delaware the station live streams on their website by clicking the "Listen Now" button. They also post the show for a week after its broadcasting, so check back for the link if you miss it. OK, on with your regularly scheduled blog...

I have been deep in research to unearth the secrets of the cooking goddesses. Women who define their particular regions and styles of cooking, women who have written anthologies of recipes, distinguished books historical record on ingredients and technique. I have already told you about my dabeling in the authentic Indian cuisine of Julie Sahini and my constant adulation of Ruth Reichl. Now, after two months of flipping through her recipes with a quiet awe, I decided to tackle the work of Marcella Hazan.

Marcella Hazan is probably the most celebrated cookbook authors of Italian Cuisine. She is credited with introducing balsamic vinegar to the American household. Yes, she's more important then Giada. The Classic Italian Cookbook was released in 1973 and when that was a hit she published More Classic Italian Cooking in 1976. For those like me with very limited shelf space, in the 90's she revised and updated her recipes and combined them into a single book, Essentials of Classic Italian Cooking, a treasure I unearthed at the Strand in August, after several visits and much searching. Funny side note: the worst kept secret in cookbook publishing is that Marcella Hazan didn't write any of those books, in the actually writing things down sense. Her husband Victor did, because Marcella doesn't really speak enough English to write a coherent cookbook. Apparently letting the husband near the food is not something I invented.

As was one of my New Year's resolutions, I had decided to learn some Italian cooking, as those lovely tempting dishes have been invading the New York palate, and I can't afford to eat at Locanda Verde every night. This book is a fabulous way to learn, because this woman has OPINIONS, and is not afraid to tell you that you are doing it wrong. For example, you are not going to be patted on the head and praised for always using fresh pasta.
"There is not the slightest justification for preferring homemade pasta to the factory-made. Those who do deprive themselves of the most flavorful dishes in the Italian repertory."
This is not to say that she prefers factory made either, she simply believes the two are different, and should be used for different purposes. The book is excellent at recommending what type of pasta you should serve with the various sauces. I chose two to start with that both called for "factory made" which gave me a break since I didn't have to spend 45 minutes making the pasta. Marcella probably would have still been disappointed in me though...
"Great factory pasta is made slowly: The dough is kneaded at length; once kneaded,  it is extruded through slow bronze dies rather then slippery, fast Teflon-coated ones. It is then dried gradually at an unforced pace. Such pasta is necessarily limited to small quantities; it is made only by a few artisan pasta makers in Italy, and it cost more than the industrial product of major brands."
Oops. I probably wasn't supposed to use Trader Giotto's then.

Eggplant and Ricotta Sauce, Sicilian Style
Adapted (slightly) from the Essentials of Classic Italian Cooking

Ingredients:
- About 1 to 1 1/2 pound eggplant
- 2 teaspoons salt
- Vegetable Oil
- 1/4 cup extra virgin olive oil
- 1/4 large yellow onion (or half of a small onion) sliced very thin
- 2 small to medium cloves of garlic, chopped
- 1 1/2 pounds fresh, ripe Italian plum tomatoes
- Fresh Ground Pepper
- 3 Tablespoons freshly grated romano cheese
- 8 to 10 fresh basil leaves
- 1 pound pasta (Recommended: Cartwheel pasta. Fusilli or rigatoni also good.)
- Fresh grated parmesan for the table

Directions:


Cut off the eggplant's green spiky cap. Peel the eggplant (or don't, if you don't mind eggplant skin and want to skip that step) and cut it into 1 1/2 inch cubes. Put the cubes in a colander and set over a bowl, then sprinkle liberally with salt. Let the eggplant steep for about 1 hour so that the salt can draw off most of its bitter juices.

While the eggplant is steeping, bring a pot of water to a boil. Cut an X into the bottom of each tomato. Plunge the tomatoes into the boiling water for 1 minute. Remove with a slotted spoon and plunge into ice water to stop their cooking. Tomatoes should now peel easily. Core the tomato like the video below.


God I love Chow Tips. Discard the core (or use it for something else) and cut the tomato into thin strips.

Once the eggplant is done steeping, rinse the cubes under cold water. Wrap them in paper towels and squeeze to remove as much moisture as possible.

Put enough vegetable oil in a large frying pan to come up 1/2 inch on the sides, and turn to medium high. When the oil is quite hot, slip in as many eggplant pieces as will fit loosely in the pan. If you can't fit them all, fry in batches. Fry eggplant, turning often, 2-3 minutes. As soon as eggplant feels tender when prodded with a fork transfer it with a slotted spoon or spatula to a platter lined with paper towels to drain.

Pour off the oil and wipe the pan clean with paper towels. Put in the olive oil and the sliced onion and turn the heat to medium high. (This is another Marcella trick, she usually believed in starting onion in a cold pan and heating them gently, which results in a mellower taste.) Saute the onion until it becomes colored a light gold, then add the chopped garlic and cook for only a few seconds, stirring as you cook. (According to Marcella, this combining of onion and garlic by sautéing is called a Soffritto.)

Add the strips of tomato, turn up the heat to high, and cook for 8-10 minutes, stirring frequently, until the oil floats free from the tomato.

Add the eggplant and a few grindings of of pepper, stir, and turn the heat down to medium. Cook for just a minute or two more, stirring once or twice. Taste and add more salt to taste.

Toss the cooked and drained pasta with the eggplant sauce, add the grated Romano and the ricotta. Toss again, mixing all ingredients thoroughly into the hot pasta, and serve at once. Garnish with basil. Serve Parmesan on the side.


OK, that "until the oil floats free of the tomato" part? I still have no idea what that means, and a google search reveals that the only person to use that phrase is Marcella Hazan. After 8 to 10 mintues the mixture had become a more cohesive form and the tomatoes had relaxed into the pan, so maybe that's what it means. 8-10 minutes, then more on. That's what you should take from this.

The dish was fantastic, delicate but filling, creamy but with substance. I was greedy with it, I wanted to eat it up all at once but then I also wanted to just sit with the bowl under my face and let that garlicky eggplanty smell fill my nose. It is such a perfect recipe for this type of year when eggplant and tomato are so plentiful and fresh. The book has tons of zucchini and peppers too, it begs to be put to use in the early fall.

Marcella is walking me through this Italian thing bit by bit, maybe I'll be ready for the 3 hour Bolognese soon, and not the sausage cheat that I did in January. I'm dreaming of the cold winter day when I let this bubble in on my stove, warming every corner of this apartment. I think Marcella and I will get along just fine.

Wednesday, September 1, 2010

Indian Pumpkin Split Pea Stew

Happy September! It's the last day of healthy vegetarian cooking! It's been quite the adventure this past month, walking staight past the meat case, playing with all kinds of edible plants and legumes. It's working pretty well on the diet front, I am weighing in at 132.9 as of this morning, which means I reached the goal of 132.2 to133.2 that I set for myself at the begining of the month. I hope to keep going, though maybe at a slower pace, until I get back down to the wedding weight of 129. I have carefully gone through the archives of this blog and more clearly tagged the low cal recipes as Diet, and the Vegetarian recipes, so that they are easier for you, my wonderful readers, to find if you are looking for such recipe ideas in the future.

I have a very exact cookbook wish list. Very exact, and a little expensive. They range from the Ad Hoc at Home to out of print stuff, from the newest most in-fashion food to the forgotten vintage recipes. Every once in awhile I do sweeps of NY bookstore The Strand to see if I can pick up one of these cheap, and recently I made two big scores.

Ever since Julia Child became the one to democratize French cooking and bring it to the states, people like to figure out who is the "Julia Child" of other sections of cooking, which usually means "wrote the best and most complete cookbook on the subject." I've been hunting for the cookbooks of two such women, Marcella Hazzan, otherwise known as the Julia Child of Italian cooking, and Julie Sahni, the Julia Child of Indian cooking. The comparisons do not hold up that well, as Julia Child was an American who learned to cook French and brought it back with her, these women actually represent the cultures they are teaching you about. They are, however, the women with the most complete cookbooks, and that meant I wanted them.(Funny side note, this isn't just a cooking thing. I recently took an exercise class with the "Indian Jane Fonda". Good class! A lot of dancing.)

The Essentials of Classic Italian Cooking I will have to tell you about later, I haven't cooked from it yet. August was, after all, the month of healthy vegetarian cooking, and I kept drooling over the meat sauces. There probably were some healthy recipes in there, but I kept flipping straight to roasts and heavy cream and lots of butter. Don't worry, these recipes are coming. While I have been searching for Julie Sahni's Classic Indian Cooking for quite awhile, that was not the book I stumbled across this past month. Her follow up, Classic Indian Vegetarian and Grain Cooking stared back at me from the Strand's shelf. I was reading it by the time I was on the subway.

I haven't played much with Indian cuisine since last year's attempt at Chicken Tikka, but now that I own the spices, I notice them cropping up in more and more recipes. Full on Indian cooking might not be hugely popular, but its influence is being found everywhere. Food Network even finally found itself a chef who knows what curry is, though it took them a competition show to do it (Congrats to Aarti Sequeira by the way!) Digging through the book, there were certainly recipes that felt like they would be a bit challenging, or too spicy for my somewhat weak pallate. Finally I stumbled across a recipe that would be more mild, and perfect for a certain Fall fruit now tumbling out of my farmer's market. Pumpkin and Split Peas with Camphor Basil. Will gave me a dubious look as we walked home. "You are going to cook a pumpkin?"

It's true, my previous pumpkin cooking has all been:
A. Using canned pumpkin, and
B. Dessert

And my last gourd chopping experience went badly. Like me staring at a butternut with a knife jutting out of it after a long struggle and wanting to chuck the whole thing in the trash and order Chinese kinda badly. That was the night of the Butternut Squash Lasagna of last October. Things have changed a bit since then though. For one, Will and I are much better with knifes. For another, I am much better with planning. As my beloved friend Stef was going to be in town on Monday night (an Indian food addict if I ever saw one) I made a very wise decision, I chopped the pumpkin on Sunday night. This was not nearly the warfare I had experienced with the butternut. Will split the thing down the center for me, as I tend to have a bit less muscle. I was going to attack it with a peeler, but cutting the skin off with very shallow knife cuts was a much more efficient and less maddening process. Then I scooped it out (reserving the seeds for toasting) and diced down into 1 inch pieces, which I stored in Ziploc containers in my fridge. The whole process probably only took 20 minutes, and that was 20 minutes I didn't have to spend while cooking the next day.

Unfortunately, despite a trip to our local Patel Brother's grocery, I could not locate Camphor Basil. It is a more bitter basil that's not easily found in the states, which Ms. Sahni recognizes by offering a substitution of Sweet Basil and Star Anise. I did not have Star Anise, but I did have Anise seeds on hand, so I worked with that. The results were still delicious, so I stand by my alteration.

Pumpkin and Split Peas with Basil
Adapted Slightly from Classic Indian Vegetarian and Grain Cooking

Ingredients:
- 1/3 teaspoon anise seeds
- 1 cup yellow split peas
- Pinch turmeric
- 3 bay leaves
- 1 small yellow onion, peeled and chopped
- 2 cups of water
- 2 pounds pumpkin (you can substitute butternut squash if needed) cut into 1 1/2 inch cubes
- 1 teaspoon sugar
- 1 1/2 teaspoon kosher salt
- 1 cup water

For the spice-perfumed ghee
- 5 tablespoon ghee (if you can not get this in your area, Alton Brown has a recipe for it here)
- 1 1/2 teaspoons cumin seeds
- 2 tablespoons shredded fresh ginger
- 2-4 hot green chilies, finely diced
- 1/3 cup packed fresh basil, then take the leaves and cut into 1/4 inch wide shreds

Directions:
Put the split peas, turmeric, bay leaves, onion and anise seeds in a deep pot with 2 cups of water and bring to a boil. Cook over medium heat, partially covered, for 20 minutes.


Add the pumpkin pieces along with 1 cup water, sugar, and salt and bring to a boil again. Lower the heat and continue cooking, covered, for 20 more minutes. Turn off heat. Transfer to a serving dish or individual bowls.


Measure out all the seasonings for the spice-perfumed butter and put them right next to the stove. Heat the ghee in a small frying pan over high heat. When it is hot, add the cumin seeds. When the cumin turns dark brown (about 15 to 20 seconds), add the finger and chilies. Reduce the heat to low and let the herbs sizzle for 30 seconds. Add the basil and let the mixture fry for 30 seconds.

Pour all of it over the pumpkin-split pea mixture. Mix with a fork just once or twice to streak it with the spice-perfumed butter. Serve immediately.


OK, so ghee, if you didn't know, is basically clarified butter. And that's a good bit of butter. Therefore, this might not be the healthiest of all of my recipes this month. But it was yummy. Stef ate 2 bowls kinda yummy. The serving suggestion Julie Sahni makes in the book is to pair this stew with an Indian bread, she suggests a Kale Bread that is in another part of the book, but as this was a weeknight meal I wasn't about to bake some bread too but that's the luxury of living in Little India. I popped some frozen Garlic Naan in the toaster oven and presto, side dish.

This dish was a bit on the heavy side especially as it was 90 degrees out, but with fall ready to kick down our door I can see this being a repeat recipe on a chilly fall day. It will be a nice vegetarian distraction, because right now I'm jonesing to get my hands on some meat. I want to roast it, saute it, stick it in a pasta sauce, I am ready to resume my carnivorous kitchen. Just as soon as the temperature drops out of the 90's so I can turn my oven on. Come on Fall, I'm waiting...

Wednesday, August 25, 2010

Vegan Corn Soup

I didn't start out trying to rid my kitchen of meat. Once I got started though, I couldn't stop! It became a challenge: how long can I keep the meat-free kitchen going? And so healthy eating month gradually became Vegetarian Cooking Month, with the eggplant, squash, and chickpeas dominating my cooking. And boy howdy has it worked. That's right ladies and gentlemen, with a week to go I weighed in at 132.3 this morning! Two asterisks here. One, there's been some serious gym attendance involved. Like 6 out of 7 days last week type of gym attendance (after returning to yoga for the first time in several months, I could barely lift my arms the next day).

And two, I am not a vegetarian. Not even temporarily. I have been eating meat, I'll order it when we go out and I'll grab a turkey sandwich for lunch at work. As far as cooking goes, however, I have been meat free since late July and since I prepare most of my own meals, that means a significant reduction in overall meat consumption. Apparently I am not alone on my quest to cut back on meat without cutting it completely from my diet. I heard a story on NPR about Meatless Mondays, a movement to reduce meat consumption across the country by 15%. The idea is to take Monday, a day where you are starting fresh and making good choices, and reducing the amount of saturated animal fat that you consume. Once this month of meat free cooking is over, I think I'll continue on by joining this campaign!

Strolling around the local farmers market last Sunday, I realized with horror that I had been neglecting one key late summer veggie. Corn. How could I have forgotten about sweet, fresh, summer corn! It's one of the first things I ever learned to cook when I moved out on my own, and yet the only time I've even glanced at it this summer was the experiment with grilling back in early July. I've been cheating on corn, running around with that little hussy the eggplant and those trampy chickpeas. As the farmer dumped a fresh bag of corn out on the table I dove, begging corn to take me back. $2 and 5 ears of corn later, I had just the dish to make things right with the betrayed.

I wanted to make a corn soup. My first thought was corn chowder, with its creamy deliciousness. As I shopped recipes, however, I quickly realized most of these required ridiculous amounts of heavy cream. Heavy cream that has 50 calories per tablespoon. Not the slenderizing soup I was looking for. Finally I hit upon a recipe that called for only low fat milk, and most of the comments said the milk really wasn't necessary at all. Swap out the chicken stock for vegetable stock and suddenly my soup was fully vegan. Score.

Vegan Corn Soup
Adapted from Bon Appetit

Ingredients:

- 1 1/2 teaspoons of corn oil
- 1 small yellow onion, chopped
- 1 small fresh Poblano chili, chopped
- 3 garlic cloves, chopped
- 3/4 teaspoon ground cumin
- 5 ears of sweet yellow or bi color corn, kernels cut from cob
- 1 1/2 cups vegetable broth
- Chopped fresh cilantro

Directions:
Heat oil in a large heavy saucepan over medium-high heat. Add onion, chili, garlic, and cumin and saute until onion and chili are tender, about 10 minutes.

Add corn to the pot. Stir in broth. Cover and simmer over medium-low heat until corn is very tender, about 45 minutes. Use immersion blender to puree soup until fairly smooth. Season to taste with salt and pepper. Ladle into bowls; garnish with cilantro and serve.

If you like, you can garnish with an avocado. It complements the flavor nicely!
A few side notes. If you don't own an immersion blender you can puree in batches by transferring to a blender or food processor. I heart my immersion blender every time I make a pureed soup and don't have to haul hot liquid, clean a blender, or worry about steam blowing the lid off said blender. If you make a lot of sauces and soups, this thing is great. Since it isn't a closed device, however, you don't get nearly as smooth a blend as you would if you used your other blending appliances. I liked a slightly chunky corn soup, Will felt it could have been smoother. Use your own judgement. Also the original recipe called for mixing in the milk at the blending phase to get the soup to a desired consistency. If you don't care about the soup being vegan and you want something creamier, you can add about 1 1/2 cups of milk at that point. Personally I thought the soup was a little on the thin side anyway and did not require additional liquid, and a taste test confirmed it was excellent without the milk. But the option is open to you.

The soup was a lovely late summer treat, very sweet (which could change depending on the type of corn you buy) and almost indulgent, without being indulgent at all. Will asked the question that always lets me know the truth of whether or not he's liked a dish. "There's more of this, right?"

Wednesday, August 18, 2010

Hummus Three Ways

"But is it Vegan?"

Will loves asking me this question every time I prepare a vegeatrian dish. He doesn't really care, If there's a burger on the menu at a restaurant, that's probably what Will's going to order. Cheeseburger? Even better. There's something just amusing to him about making a dish that conforms to a whole laundry list of things you can't have. And I personally feel that cheese and sour cream make most vegetable dishes better, the answer is almost always no, diminishing my smugness and since of self satisfaction. Kill joy.

The "low meat" diet has been helping me trim down (133.6 for those keeping score at home), and as I've researched new ways to feed myself without cooking up three pounds of pork I found something equally promising. Food I did not have to turn the oven on for. As the temperture hovered at 90° and the humidity made the hair stick to the back of my neck, my food processor and I became best friends. I was going to make my own hummus.

This is one of those things that everyone tells you is "so easy!" but you never quite get around to buying that can of chickpeas or procuring tahini, and the container of already made hummus is right there in the chilled case and look how easily that lifts into your cart. Two weeks ago though, desperate for a meatless dinner that would take no time at all, I decided to tackle this ancient food. When looking for a recipe I hit paydirt in Mark Bittman's hummus recipe. Mr Bittman, a man so annoyed with fussy cooking he writes a column called "The Minimalist" is a bit of a hero to me. When I made his Pear Upside Down Cake last year I knew I had found a soulmate in cooking and sarcasm. And if I wasn't sure how much he endorsed this particular recipe, I had to look no further then the title of the book he included it in: "The Best Recipes in the World". Check.

Hummus
Adapted practically not at all from the Best Recipes in the World

Ingredients:
- 1 cup drained well cooked chickpeas or 1 15 oz. can of chickpeas (often labeled Garbonzo beans), liquid reserved
- 1/4 cup tahini
- 2 tablespoons extra virgin olive oil, plus oil for drizzling
- 1 garlic clove, peeled
- Salt and black pepper to taste
- 1 tablespoon ground cumin or paprika, or to taste, plus a sprinkling for garnish
- Juice of 1 lemon, more can be added to taste

Directions:
Put all ingredients in a food processor and begin to process, add the reserved chickpea liquid as needed to create a smooth puree.
Taste and adjust the seasoning (Mark Bittman likes to add more lemon juice, and I agree). Serve, drizzled with the olive oil and sprinkled with a bit more cumin or paprika.


The batch was fantastic, softer then store bought and melted in your mouth. So great I may have forgotten to take a picture of it. Oops. I want to stress again how much more lemon juice can help, the more juice the brighter the hummus becomes. Will felt it was a bit too far on the garlicky side, but then he's not the biggest fan of garlic, so use precaution in deference to your own tastes. I served it on pita bread that I had brushed with olive oil and thrown on the grill pan, making it crispy and delicious. I wasn't done through. In fact, I was just getting started. Now that I had taken on a basic hummus, I was ready to plunge into a national trend, defiling the stuff by flavoring it. And I was feeling a bit Southwestern one day.

Black Bean Hummus
From Joe D's Cafe (apparently no longer open)

Ingredients:
- 1 15 oz can black beans or 1 cup well cooked black beans, drained, liquid reserved
- 3 Tablespoons tahini
- 2 Tablespoons fresh lemon juice
- 2 Tablespoons chopped fresh cilantro
- 2 scallions, sliced, white and light green parts only
- 1 Tablespoon olive oil
- 1 large garlic clove, minced
- 1/2 teaspoon ground cumin
- 1/4 teaspoon cayenne pepper

Directions:
Put all ingredients in a food processor and begin to process, add the reserved black bean liquid as needed to create a smooth puree. Season hummus to taste with salt and pepper, and adjust seasoning as desired (threw in a bit more cumin and cayenne). Spoon into bowl.


The black bean was, off the three, Will's favorite. He liked the spiciness, it made him want more. A friend of ours, Brian, who was staying for a few days fell deeply in love with this particular hummus, for a moment I throught we would have to leave the two of them alone. By my sampling of two, I have concluded this is the preferred hummus of the male gender. I am a scientist dammit.

My fickle female heart had wandered on though. I had discovered a recipe for a much more asian hummus, a hummus that had soy sauce and rice vinegar and would even use some of the chili garlic hot sauce I've had sitting in my fridge since back when I made pork dumplings, not to mention some of the ginger we've had on hand since Will started making ginger syrup for his Blueberry Mojitos. This would be damn useful hummus.

Ginger-Garlic Hummus
Adapted a bit from Bon Appetit

Ingredients:
- 1 small garlic clove, peeled
- 1 1/2 inch piece of peeled fresh ginger
- 1 cup drained well cooked chickpeas or 1 15oz can of chickpeas , about 1 1/2 Tablespoons of liquid reserved
- 2 Tablespoons Almond Butter (the original recipe calles for cashew butter, but that stuff is like $6 a jar and I was able to find a little packet of almond butter for like 75 cents.)
- 1 1/2 Tablespoons rice vinegar
- 3/4 teaspoon soy sauce
- 1/4 teaspoon chili-garlic sauce
- 1/2 teaspoon ground anise seeds
- 2 Tablespoons chopped fresh cilantro
- 1 teaspoon sliced scallions

Directions:
Mince garlic and ginger in processor. Add beans, reserved liquid, almond butter, vinegar, soy sauce, chili-garlic sauce, and anise. Process mixture to a coarse puree. Add cilantro and scallions, process to combine. Transfer to bowl.


This was probably the least beloved hummus, but still tasty. I took some into work with pita and some cucumber rounds and felt very smug and self satisfied indeed at my healthy lunch.

All in all the world was right, hummus, especially basic hummus, is incredibly easy to make. Mark Bittman even suggests keeping a few cans of chickpeas on hand so you can bang together a snack at a moments notice, and I'm always a fan of seeming effortlessly fabulous. Once you start making flavored hummus, recipes start jumping out at you from everywhere. Eggplant hummus? Why I happen to have an eggplant from the farmers market right here! Chipotle hummus? That sounds spicy and perfect for a Sunday football party! Will's starting to look a little weary though, it has been a bit of hummus overload. Recently, he's taken to dragging game animals into the middle of out living room and leaving post-it notes on them pointing to the tenderloin. I'm pretending not to notice. I think I may have to start actually cooking food again, and not just blending it in a food processor. He has to admit though, we've been eating very Vegan.

*Note: Each recipe makes about 1 1/2 cups.

Monday, August 9, 2010

Grilled Ratatouille Salad

"I think I bought too many vegetables," I said the other night, staring at a counter full of eggplant, peppers, zucchini, squash, and onion. 
"Well how many is the recipe for?" my husband asked, looking a bit daunted himself. 
"Two."
"I guess it should be alright then."
"Um...."
"What?"
"I added things," I admitted, as I grabbed my knife.

This vegetable thing might be getting out of hand. The weight loss thing is going pretty well (134.9 as of Sunday morning, thank you very much) but the quest as well as the onslaught of seasonal vegetables has turned me into, well I'd say a temporary vegetarian but the NY Times might sue me. And it's not really true either, I had a hot dog at Water Taxi Beach the other day and I'm sure I'm pretty sure a turkey sub made it into my lunch rotation this week. Hey I work in Midtown, what do you want from me? As far as cooking though, I haven't brought so much as a chicken breast into my apartment in two weeks.

The sale at Whole Foods read like the ingredient list for Ratatouille, a dish that roughly translates into "pile of late summer vegetables." There are chefs like Julia Child who insist you saute and layer each vegetable. Then there are radicals like the rat in the movie, making some crazy dish that wows the critics. The typical French stew seemed kind of heavy for the hot weather though, so I did some research and  found a recipe that called for grilling the vegetables, but it didn't include squash, which I consider a ratatouille staple, and while it called for red pepper I had a green one just sitting in my fridge... so I used both.

Grilled Ratatouille Salad with Feta Cheese
Adapted from Bon Appetit

Ingredients:
- 1 12-14 oz eggplant, cut into 1/2 inch thick rounds
- 1 zucchini, quartered lengthwise
- 1 yellow squash
- 1 red bell pepper, cut lengthwise into 6 strips
- 1 green bell pepper, cut lengthwise into 6 strips
- 1 medium onion, cut into 1/2 inch thick rounds
- 3 tablespoons olive oil

- 2 to 3 teaspoons balsamic vinegar
- 2/3 cup crumbled feta cheese

Directions:
Place grill pan over medium heat. Place vegetables on a baking sheet. Drizzle with olive oil and sprinkle with salt and pepper, turn to coat. Grill vegetables until tender and tinged brown, turning frequently, about 6 minutes for eggplant, zucchini, and squash, and about 10 minutes for bell peppers and onion. If your grill pan is not big enough for all that food (like mine) work in batches transferring to a baking sheet in a 200 degree oven to keep warm.

Divide vegetables between 2 plates; drizzle with vinegar. Sprinkle cheese over and serve.  


All the vegetables were very tasty. This might have been great as a side dish, but passing it off as a main dish lacked something. Traditionally ratatouille is served over rice or pasta, so that probably would have served this as well. I have been reaping the benefits of my pile of cooked veggies for days though. Every morning for the next few days I was able to throw together an amazing egg white omelet in no time flat. Just chop up the leftovers (minus the eggplant, that got a little soggy) saute for about 2 minutes to heat them up, and they were fabulous to fill my breakfast. Not to mention the fantastic imported feta cheese I had purchased to finish the dish (and at $5 for the container there was no way I wasn't using that up). The August veggie binge continues. I swear, one of these days Will's going to bring home a raw steak and give me puppy eyes until I cook it. What are your favorite vegetables/preparations at this time of year? Leave it in the comments!

Wednesday, August 4, 2010

Grilled Eggplant Parmesan

"Oh dear. That's not good."
That was my reaction the other morning when, for the first time in a month, I weighed myself.

I wasn't entirely surprised, and I imagine you aren't either, even before I had just stopped weighing in, the scale had been creeping dangerously upward for a few months. Taking the month of July off to just not care at all hadn't helped things. Still I regret nothing. The Blueberry Peach Gratin, the Kale cooked in Panchetta grease, the Food Truck Drive In, all were amazing ways to spend my summer. And then there's the food I didn't blog about, but lets just saying I'm getting markedly better at homemade ice cream. Ooo, and Restaurant Week was great, I highly recomend the egg yolk in truffle butter of "Uovo" at SD26. But not as diet food.

So yes, I have officially gained back half the weight I had taken off for the wedding, but I haven't been all that depressed about it. Why? Because August is an amazing month to cut your calories by eating fresh veggies and lots of them. The days in early summer when the farmer's market was a bit sparse are long gone, and now table after table teems with food pulled right out of the ground and ready to be my dinner. I filled my freezer with homemade veggie stock last weekend and I am all ready to see what low cal options I have as the harvest comes in. I'm already dreaming of remaking that Zucchini Soup vegetarian style.

A stroll through the farmer's market this past weekend had me picking up my very first Eggplant of the year, and with the beautiful tomatoes piled in bin after bin, I knew just what I was craving. I wanted Eggplant Parmesan. "WAIT!" I can hear you all crying, "Deep frying your veggies is not going to help trim your waistline!" While I have breaded and fried my veggies before (and believe me I love them that way) this recipe only calls for grilling the eggplant. No egg, no breading, no frying. Which means like 87% less guilt. There is a bit of cheese still involved, which if you are super dieting you could go with the low fat versions available in every supermarket. Since I had already foregone meat and deep frying, I figured I could afford real cheese. Besides, I had a huge chunk of aged parmesan just sitting in my fridge. I refuse to be wasteful.

Speaking of not wasting things, I had a bowl of lovely heirloom cherry tomatoes sitting in a bowl on my table that we picked up at Brooklyn Grange last week (still love these guys and their rooftop garden). It wasn't nearly enough to complete my sauce, but they were going to turn soon if I didn't use them, so I combined them with the plum tomatoes I had picked up. This paled the color of the sauce a bit, but the flavor was still great. Also it looked really pretty sitting in the blender.

Grilled Eggplant Parmesan
Adapted from Gourmet
Serves 4

Ingredients:

Tomato Sauce:
- 1 1/2 lbs. tomatoes, roughly chopped
- 2 tablespoons extra virgin olive oil
- 1 medium yellow onion, chopped
- 5 garlic cloves, chopped
- 1/4 teaspoon red pepper flakes
- 1/3 cup grated Parmigiano-Reggiano (the light stuff if your super worried about total calories)

Sandwiches:
- 4 (6 inch) hoagie rolls, split
- 1/4 cup extra virgin olive oil
- 2 (1 lb.) eggplants
- 1/2 lb. thinly sliced provolone or fresh mozzarella (again, there are light versions)
- 1 cup of basil leaves

Directions:
Puree tomatoes in a blender or food processor until smooth. Heat oil in a 3-4 quart heavy saucepan over medium-high heat until it shimmers. Saute onion and garlic with red pepper flakes until golden, about 4 minutes. Add tomato puree, 1/2 teaspoon of salt, and 1/4 teaspoon pepper and simmer, uncovered, stirring occasionally, until thickened, 30-35 minutes. Remove from heat and stir in cheese. (If you've made a tomato sauce before, you know there's room to play here. I threw in a pinch of brown sugar to cut the acidity and a shake of my favorite focaccia blend because I believe it can do no wrong. If you have some seasoning you think would make this even more kick ass, go nuts.)

Once sauce is prepared place a grill pan over medium-high heat. Brush grill pan with olive oil. Cut eggplants crosswise into 1/2 inch think slices. Brush both sides of slices with olive oil, and season with a pinch of salt.

Grill eggplant, loosening with a spatula and turning occasionally to avoid over browning, until very tender and clear grill marks appear, about 6 to 8 minutes. In between flips you can cover your grill pan with a cookie sheet.

Toast rolls. While rolls are still hot, lay on cheese. (I did this while they sat in my toaster oven, and then waited for the cheese to melt to remove them.) Top with eggplant, and spoon on about 3 tablespoons of sauce per sandwich. Place basil leaves on top. If you like, you can add a small sprinkle of parmesan to finish.


These sandwiches are great. They burst with all the bounty of the farmer's market, and they are so low on the guilt scale that I had two of them (seconds are probably not dietician recommended). Before we moved to NY I don't think Will had ever eaten eggplant, but there he was, inhaling this vegetarian delight.

So the goal is to lose 3-4 pounds by the end of August, since I'm going to the shore on Labor Day. How am I doing?  I'm breaking my own rules here and going public with some sensitive information. Be kind. On July 31 I weighed in at 136.2 (the wedding weight was around 129). Therefore the goal for the month is between 132.2 and 133.2, and this morning I am down to 135.4! I have rejoined my gym as well and I am on my way! Feel free to play along at home, I'll give you an update of my status and hopefully a healthy new recipe every Wednesday this month. Having your own weight loss struggles as the summer plies us with pie and ice cream? Tell me what you plan to do (or not do) in the comments! And cheer me on!

Wednesday, July 21, 2010

Basil Zucchini Soup

After the grilled zucchini I made a few weeks ago, the flavor has been haunting me. That juicy, fresh flavor that a recently cut zucchini has, the vibrant green. Zucchini season just inspires me to eat veggies. Will and I have been on a bit of a veggie kick lately (which means that I'm on a veggie kick and Will eats what I make him. What's he going to do, cook for himself?) brought on by the amazing bounty of the farmers market, and my desire to not turn the oven on. I know I could stir fry, bring out the grill pan, or even saute a lot of meats, but the truth is at this time of year meat just takes too much time and too much heat. Most of the meat we've had lately has been in the form of prosciutto or salami, cooking already done.

It was a whim, really, that those two huge zucchinis ended up in my bag at the Jackson Heights Farmers Market last week. I didn't know what I was going to cook yet, and they just looked so hearty and awesome. It was time, I decided, for a fresh summer soup.

I wanted something simple, not too many ingredients, easy to make on a weeknight. This soup appealed to me because of its use of basil, another heavenly summer ingredient. Use a light hand with it, otherwise the soup can come out a bit too pestoy, though that's really not the worst thing in the world. I used chicken stock because I still had a large bag of it in the freezer, but next time I might use vegetable stock if I have it on hand to make it a completely vegetarian soup. (I would say vegan, except I loved dropping spoonfuls of sour cream or creme fraiche into it, making it decidedly unvegan.) *Editors Note: I tried making it with vegetable stock a few weeks later, also very delicious.

Zucchini Basil Soup
Adapted from Gourmet Magazine

Ingredients:
- 2 pounds zucchini, trimmed and cut crosswise into halves.
- 1/2 teasoon salt
- 3/4 cup chopped onion
- 2 garlic cloves, chopped
- 1/4 cup olive oil
- 3 cups stock (chicken or vegetable)
- 1/3 cup basil leaves
- 1 cup of water

Directions:
With a vegetable peeler, peel skin off of half a zucchini into thin strips; toss with salt and drain in a sieve until wilted, for at least 20 minutes. Coarsely chop remaining zucchini.

Cook onion and garlic in oil in a 3-4 quart heavy saucepan over medium-low heat, stirring occasionally, until softened, about 5 minutes. Add stock and simmer, parrtially covered, until tender, about 15 minutes. Using caution with the hot liquid, use an immersion blender, puree soup with basil.  (If you don't own an immersion blender you can puree soup in 2 batches in a normal blender.)

Bring water to a boil in a small saucepan and blanch peeled zucchini skin 1 minute. Remove skin with a slotted spoon. If your soup is too thick, you can use the blanching water to thin it out.

Season soup with salt and pepper. Serve in shallow bowls with zucchini skin strips mounded on top.


This soup was fantastic, fresh tasting and quick to put together. A few tips if you are making this on a weeknight: since the soup is eventually pureed, the chopping in this recipe does not need to be the most pretty. If you have one, you can chop the onion in a food processor, which I won't usually do because it can emulsify the onion, but in this case its not a big deal. The peeled skin garnish can be skipped, but they are really tasty and add something really nice to the soup, so I recommend making them, it doesn't take very long.

Will scarfed down three bowls before I stopped him--the man was going to eat my lunch for the next day! But then, confession time, I went out for lunch the next day. No problem, I popped the soup in the freezer and ate it nearly a week later, at which point it was still perfection. Though the recipe could be trimmed down (it makes 4-6 servings) I say make the whole thing and freeze, then eat it later with sour cream at work. I promise, co-workers will be jealous.

Wednesday, July 7, 2010

Playing with Fire

In the boiling hot weather that has permeated the East Coast this summer, Americans favorite method of summer cooking has been everywhere. America loves to grill. Loves it. Can't get enough. From the NY Times 101 Ways to Grill last week to the increasing numbers of Food Network stars being shoved out of the comfortable havens of their studio kitchen sets and into really fake looking backyards, everyone has been excited to cook their food on a rack over flames.

Everyone, that is, except me. I have no backyard, no balcony, and therefore, no grill. For me summer doesn't mean "Oh fun, I'll just go outside to cook!" It means trying not to pass out from the heat in my not-air-conditioned kitchen. My grill pan delivers up Turkey Burgers and Steak just fine, but there is none of the atmosphere of standing out side on a summer evening, delivering up piles of burgers and veggies fresh off the open flame. On July 4th, however, I got a bit of a taste of the good life. Using the holiday weekend to shoot of to PA to visit the family, my mother gave me free range of her tiny little Weber grill. In my mom's world, everything is tiny and built for one, and this little glorified camp stove is no exception. Still, it was a grill, and I was going to cook dinner for 3 on it, even if it meant doing everything in shifts.

First up, I was going to grill corn. As corn season has begun I have started seeing the ears everywhere, and though corn grilling is a fairly simple procedure, I had never executed it.

Grilled Corn
Done exactly as Gourmet tells me to

Ingredients:
- 3 ears of corn
- At least 1 gallon of cold water in a pot or clean bucket
- Butter and salt for serving

Directions:
Peel back the corn husks and remove the silk. Pull the husks back up around the corn. Soak corn in water for 10 minutes.

While corn soaks, prepare grill. When fire is hot drain the corn and grill, in the husks on a lightly oiled grill rack, uncovered, turning, 10 minutes. Carefully pull back husks and grill corn, turning, until slightly browned and tender, about 5 minutes more.

I love how easy grilling recipes can be, and the corn turned out great, soft enough to eat but still crunchy, with that slightly smoky flavor you don't get from boiling or steaming. Once it was done I pulled off the husks completely and covered the plate in foil. It was time for round two.

The day before at a picnic at my Aunt and Uncle's house, my very generous Uncle Joe allowed me to raid his vegetable garden. My Uncle Joe has been gardening for as long as I can remember, and quite frankly the garden is an organic localvore's dream. He uses no chemicals, creates his own little plants from seeds, and cares for the garden meticulously every year. From garlic to cherry tomatoes he brings in a great crop every year. My mother looks forward to being in charge of watering every year when they go on vacation so she can raid the freshly grown produce.

Uncle Joe gifted me with a gorgeous zucchini and two beautiful spring onions. The beauty of knowing a grower is you can eat things right after they are clipped from the plant, and I was going to eat that zucchini right away. I did it simply, two simply to lay out a detailed recipe for you. I simply sliced the zucchini into 1/4 inch slices, brushed with olive oil on both sides and sprinkled with salt and pepper. then I just tossed them on the grill, about 3-4 minutes per side, until they looked nice and charred. 

I decided I needed a sauce for the zucchini to be dipped in, so I thought I'd mix some mayo with garlic, to make a kind of aioli. To roast the garlic a bit I chopped up 1 large clove of garlic, brushed it with a bit of olive oil, wrapped in in a tin foil packet and threw it on the grill for 5 or 6 minutes next to the zucchini. Almost as an afterthought I cut a lemon in half and grilled it next to the veggie. Then I mixed the juice (about 1 tablespoon) with about a quarter cup of mayonnaise and the garlic. The zucchini was great, softened and juicy, and the aioli complemented it well giving it a tangy cool topping.

I also made mussels in beer, but that dish I feel is too incomplete to talk about yet, and I was trying to recreate a restaurant dish I had heard about but never tasted. If you've ever made mussels in beer and have tips, leave it in the comments. I'm back in NY now, hiding in the bedroom, the only room in the place with air conditioning. This doesn't mean I've entirely stopped cooking. Last week I made a fresh mint ice cream, and churned it in the bedroom so the bowl wouldn't defrost. Two months before the weather begins to cool, let's see how creative I can get!

Wednesday, April 28, 2010

Soy Sauce Eggs

Do you ever have those restaurant foods that drive you mad? A single dish that will float in your mind, demanding you return to the establishment to sate a craving? To me, this is the Soy Sauce Egg (otherwise known as Shio Tama) at Ramen Takumi (formerly Setagaya) near Union Square.. These are soft boiled eggs, with a tantalizingly runny center with a solid white, marinated in soy sauce and left floating in the soup. I will return again and again to consume these salty, slurp-worthy treats. The addiction was becoming too much, a month would go by where I didn't have time to travel downtown for Ramen, and I would start to try to find reasons just to be in that neighborhood. After reading Momofuku for 2's posting about Soy Sauce Eggs, it hit me. Why didn't I just make them myself? Imagine, any time I wanted I could indulge in these perfectly salty snacks, without the assistance of the F train. I didn't know what I was getting myself into.

Apparently most "Soy Sauce Eggs" are hard boiled. Hard boiled eggs are a snack that had been around my house as a kid that I was resoundingly against. The white part was always fine, but the chalky, solid yolk I found really gross. If I was going to create this I was going to have to do it in steps.

1. Figure out how to perfectly "soft boil"
2. Figure out how to perfectly peel this somewhat delicate creations
3. Decipher the best Soy Sauce based marinade
4. Create the best method of serving and devouring my new treat

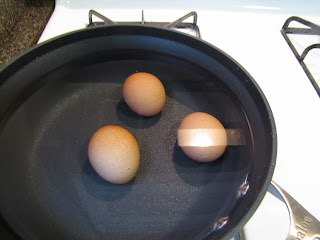
I will not disclose how many eggs I went through teaching myself to soft boil. There were the ones that were in too long, reaching that point of hard boiled with the gross chalky center, and worse, there were the ones not done enough, creating an egg too delicate and runny to work with.  A soft boiled egg, it turns out, can be achieved by carefully submerging your egg in rapidly boiling water for 6 minutes, but to get that perfect, almost gel like yolk that I love in ramen exactly 7 minutes is what you need. Once removed from the water, submerge your eggs in ice water to stop its cooking.

Peeling eggs was another challenge. The first attempt left the egg white torn and divited, not exactly perfect for submerging in a marinade or for creating a pretty snack. I saw videos on the internet where, after removing the top and bottom of the shell, the egg can be easily "blown" out of the remaining shell. Apparently this only works for hard boiled eggs. When you try it with a soft boiled egg, you end up with yolk all over your jeans, your hands and your floor. Trial and error people. Finally I learned to tap it gently on the bottom, where the natural air pocket is, and delicately peel from there. Some people hold that if you put vinegar in the ice water bowl it makes the shell more brittle and easier to peel, but it seemed the same either way to me.

Finally it was time for me to choose my marinade. Many marinades consist of water, sugar, and--of course--soy sauce. Some include green onions and ginger. Most, it seems, involve simmering the eggs directly in the marinade. That last part seemed like a dangerous idea to me. I had creating the perfect consistency of soft boiled egg down to a science. Since most soy sauce recipes use hard boiled eggs, exposing them to some extra heat wasn't a big deal. To my perfectly gooey yolks, it was a very big deal. Momofuku for 2 however, did not put the eggs into a simmering marinade. She made a combination of soy sauce, mirin, and sherry vinegar, and just lets them soak for an hour. I went for a combination of the two ideas. This method is essentially of my own invention, stealing bits of ideas here and there. This is not to be taken as an extremely authentic way to create soy sauce eggs, it's just the recipe that worked for me.

Soy Sauce Egg Marinade

Ingredients:
-1/2 cup of water
-3 Tablespoons of Soy Sauce
-1 teaspoon of sugar
-1 green onion, sliced, white and light green part only
-3 Soft Boiled Eggs, peeled

Directions:
Whisk together water, soy sauce, sugar and green onion in a small saucepan. Simmer for 5 minutes. Remove saucepan from heat and allow to cool. Place eggs in a sealable storage bag and pour marinade over top, submerging the eggs. Refrigerate for 1 hour. If the eggs are not completely covered, turn the eggs after half an hour to get even staining. Remove from marinade and either eat immediately or keep refrigerated in a sealed container for up to 2 days.


Finally I had to find the perfect way of serving these delicious, salty, gooey treats. Momofuku for 2 used green onions and fried shallots to top. An Epicurous recipe for soy quail eggs used sesame oil. Again, I went for an amalgamation. Slicing the eggs in half, I arranged them on a plate. Having tried them both cold, straight out of the fridge, and warmed in the microwave for 15 seconds (just enough to warm without further cooking the yolks) I prefer warm, but both are acceptable. I put about a Tablespoon of sesame oil in a small pan over medium heat. When it was hot, I sliced up a shallot and sauteed it in the oil. Once crisp and browned on the edges (about 2-3 minutes) I poured the entire contents of the pan over the eggs. On some eggs, if I felt I needed a bit more of the rich soy sauce, I would put just a drop or two of sauce straight into the gooey yolks, where the drops would expand into veins of flavor. It's really one of those recipes you can play with and add things where desired. I had made a perfect snack, with all of the soft, slurpy, saltiness I had spent so much time obsessing over while eating ramen.

I have made many of these over the last few weeks. Sodium intake might be becoming an issue. I should stop soon. Will might be breathing a sigh of relief, thinking no more eggs all over his kitchen, no more of this food he finds so gross popping up a few times a week. I, however, am not ready to give up eggs anytime soon. I still want to learn how to poach one. Stay tuned.

Tuesday, April 13, 2010

Black Bean Burgers

Spring is a tempting bitch. A warm breeze passes through, some sunshine passes through the clouds, and you think, "It's Spring! Spring is here!" And you know what happens next? You get spring confused with summer, or at the very least you get early April confused with late May, and you decide that fresh veggies are just around the corner. You see one tulip and you become convinced that asparagus, tomatoes and leafy greens will soon cover your table. This is a dangerous thing to think in early April. Why? Because the next thing that happens is you open a cabinet, and you spy all those traitorous canned foods. You can't let the fresh veggies see you with the canned food! What will they think? "Out!" you cry, grabbing every can and lining them up on the counter. These must be disposed of. Preferably in a delicious way.

The tomatoes went into a delicious vodka cream sauce. I can't blog about that because it got eaten too fast and there were no photographs. That's right, I destroyed the evidence so the heirlooms wouldn't see.

Then it was just the black beans and I just staring each other down. I should have never bought two cans of beans. I had never cooked black beans before, and as soon as I had them in my possession I realized all the really good sounding recipes called for dried beans. Stupid canned beans...staring at me from their stupid metal prison, they were taunting me. I vaguely remembered a magazine recipe of a black bean burger, and the vegetarian healthiness appealed to me, as my frame seems to have picked up an extra pound or two with the cheesy egg experiments. Also appealing was that the recipe take about 20 whole minutes to make. Sounds like Monday night meal to me. I found a recipe that satisfied a lot of my pantry cleansing needs, including calling for mayonnaise. I had recently scored some Japanese Kewpie mayo, and have been dying to try it out on something.

One thing I noted in the reviews of the original recipe, some people complained it was too bland for them. People often have similar complaints about turkey burgers so I pulled out a trick from the ones I make and added some chopped green peppers to the mix, which also gave the patties a much needed kick of color.

Black Bean Burgers
Adapted from Gourmet Magazine


Ingredients:
-2 14 oz cans of black beans, rinsed and drained, divided
-3 tablespoons of mayonnaise
-1/3 cup dried breadcrumbs
-2 teaspoons of cumin
-1 teaspoon dried oregano
-1/4 teaspoon of cayenne
-1/4 cup chopped green peppers
-2 tablespoons olive oil
-4 soft hamburger buns

To top: sliced avocado, sliced tomatoes


Directions:
Pulse 1 can of beans in a food processor with mayo, breadcrumbs, cumin, oregano, and cayenne until a coarse puree forms. Transfer to a bowl and stir in remaining can of beans. Form mixture into 4 patties.

Heat oil in a 12 inch heavy skillet over medium high heat until it shimmers. Cook burgers until outsides are crisp and lightly browned, turning once, about 5 minutes total. Transfer to buns.

The result was quite tasty, very earthy but the fresh veggies gave it some much needed brightness. If I had sour cream that would have been a lovely topper for such a burger, but it had been sitting in the fridge too long and had gotten a bit too sour. I eyed my newly acquired mayo. I plunked a teaspoon and a half into a ramekin and squeezed in about half a teaspoon of lime juice. Whisked together, it made a great spread for this very heavy meal.

In the end, I think this burger makes a great base that could be taken in many different directions. I may go more Southwestern and add jalapenos. Maybe I'll wear a ten gallon hat while I do it. I may take a cue from the cumin and head to Southeast Asian, plunking some curry powder into the mix. Cause I would look hot in a sari. Any way you spice it up, its a great way to use what you have on hand to make a really quick and interesting week night dinner (or to sate some vegetarians at a cookout this summer). But me, I'm done shopping my cabinets for dinner. I'm ready to fill this apartment with fresh veggies that will appear in the farmers market soon. Really. Any minute now. Green will come sprouting out of the earth. Tap. Tap. Tap.

Tuesday, March 30, 2010

Discovering the Egg

There are times when my husband comes home, and looks at me like I'm crazy. These times usually coincide with some crazy cooking project I've delved into. When the kitchen was so covered in flour from my fresh pasta experiments, when the entire apartment was filled with the heavy sent of barbecue sauce, I was the recipient of extremely concerned glances and the deeply worried "Honey?" Such was the scene this past weekend as our waste bin filled with egg shells. He got home, glanced at the cookbooks and magazines that covered every available surface, and knew something was up.

Easter looming, his 27 year old wife had decided to learn how to cook an egg.

I've dabbled before. In high school I would make scrambled eggs, before I finally admitted to myself that I don't really like a whisked and fluffy egg. I've fried eggs, made them Over Easy, and even tried to craft an Egg White Omelet, which hasn't been very successful thus far, more of a spattered but tasty egg white mess really. But on the whole I don't take on the shelled wonders very often, relegating them to ingredient rather then main dish status. Partly it's been because Will really, really hates eggs, so I would be the only one eating them. Partly it's been because, honest to god, I don't know how to cook them in the more sophisticated ways. Speaking to friends, I don't think I'm the only 20 something in America staring down an egg with a bit of bewilderment.

With Easter looming, however, surrounding by the imagery of the egg, I had to have them. I wanted to devour solid whites and runny yolks. I wanted them flavored and boiled and baked, combined with herbs, heated gently, I wanted to bite and slurp and revel in the eggy goodness. NY is a great place to find a variety of eggs, at one Whole Foods alone I have seen quail, ostrich, duck, and emu. As an egg novice, I decided to play it safe and stick to the basic chicken.


There were two big experiments that went into my egg weekend madness. The first was my quest for the perfect soy sauce egg, a quest I blame entirely on the blog Momofuku for 2 which talked about them so temptingly last week. As of this post, it has not gone well. The first trials have been delicious, but not pretty. The perfect boiling times have not been worked out yet, the perfect marinade is still being toyed with, and honestly? It turns out I don't know how to peel an egg. Egg. Shells. Everywhere. Apparently there's a way of getting around this by blowing out the egg. Ew. Stay tuned, I will keep you posted on my progress. If my husband doesn't kill me first.


The second experiment is something I have been mulling in my head for quite awhile. I wanted the sophisticated brunch treat that is the baked egg. I first read about this delicate dish in the January 2008 issue of Gourmet, with amazing food porn splayed across it's pages. In Chef Scott Peacock's recipe little individual servings splayed across an outdoor table, and I felt that one could not start a day in a more impressive and grown up way then by serving up these little beauties. The filling ingredients of spinach and ham were not things I had on hand this weekend, however. What I really needed was something that incorporated cheese. In a bit of impulse shopping over the past two weeks I have ended up with an Irish Cheddar, a Swiss, and a Gruyere all staring up at me in the fridge, begging to be incorporated into various dishes. The epidemic is so bad that, attending a wine and Spanish food tasting at Despana in my neighborhood this weekend, I had to beg Will to not allow me to walk out with any cheese. I mourn the Manchego I left behind.

My research turned out a baked dish with Gruyere, but it included herbs I did not have on hand and was made in a big dish with 10 eggs, not the individual servings I was looking for. Since my husband wasn't going to help me consume this, the individual serving was key.

Eggs with Cream, Gruyere, and Shallot
Makes 2 Individual Servings

Ingredients:
- 1 Tablespoon and 1 Teaspoon Butter plus extra for greasing ramekins

- 1 Shallot, sliced
- 1 Clove of Garlic, Chopped
- 1/4 Cup Shredded Gruyere
- 3 Tablespoons Cream or Half and Half
- 2 Large Eggs
- 1/2 Teaspoon Dried Thyme
- Salt and Pepper
Equipment: 2 (6oz) Ramekins

Directions:
Preheat oven to 350 degrees with rack in the middle. Butter ramekins.


Saute shallots in butter until beginning to crisp, about 2-3 minutes in a small pan over medium heat. In the final minute add garlic and saute until fragrant. Remove and divide into ramekins. Stir in shredded cheese. Spoon 1 tablespoon of cream over each serving. Crack 1 egg into each ramekin. Spoon half a tablespoon of cream over each egg. Season with salt, pepper, and thyme. Dot each top with a scant 1/2 teaspoon of butter.

Put ramekins in a shallow baking pan and bake, rotating pan halfway through baking, until whites are just set but the yolks are still runny, 15 to 20 minutes. If you do this in a toaster oven, the time will be closer to 12-15 minutes.
The ingredients are completely based on what I had around, resulting in a perfect cheesy, veggie, herby combo. But really, you can add what you wish. Scallions instead of shallot, or add some mushroom. Fresh Rosemary would be a good substitute for the dried thyme, if you have it around. Heck if my thyme plant hadn't died, I would have preferred fresh.

I served this with a slice of toast on the side, and it was delectable, gooey and yet still sophisticated. It the best of two egg worlds really, the mix and match ability of an omelet, but the runny yolk of a fried egg. Baking gives it that fancy edge that just screams "I should have a mimosa in my hand right now." I'm really always looking for a way to work that phrase into a conversation. Really it's the second best part of brunch. You know, besides the eggs.

PS- Reminder that the Short and Saucy pan (just like mine) giveaway ends tomorrow at midnight Eastern Time! Run over to our 100th blog and leave a comment! And isn't it pretty?